For millennia man has sought warmth, security and comfort from the chemical reaction known as fire. In it’s modern context, it’s enjoyed by people of all ages for cooking, providing warmth, and as a nice centerpiece for ghost stories. Building a campfire may seem straightforward, but there are several techniques to doing so, and in this no-bull guide we will cover the basics to help you get that campfire going in time for dinner. Read on for how to build and start a campfire.
Choose An Ignition Source
Whether you choose to use a propane/butane torch, matches, flint and steel, magnifying glass or some other source, determining which one you will use is the first step in this guide on how to build and start a campfire.
In this guide, we will be using strike-on-the-box matches to start your campfire. Put your matches in a nice dry spot close to where you plan to build the fire. Your pocket is a great place to put them, if it’s dry.
Prep The Area To Build Your Fire
Before you even begin to scout the area for wood to burn in your campfire, you need to select an area to build it if a designated area like a fire ring or pit does not already exist. If a designated area is not available, the best place is going to be wherever you are allowed to that is away from structures, tents, vehicles, animals, or anything you wouldn’t want to accidentally catch on fire.
HOW TO BUILD AND START A CAMPFIRE SAFETY TIP: NEVER build or start a fire in an enclosed space without a chimney and good ventilation because this could cause a buildup of toxic gasses like carbon monoxide. Carbon monoxide can be lethal.
This is a good time to think about the overall size of your campfire. Determine this by thinking about your needs. Is this fire going to be for cooking? Is it going to need to keep people warm for survival purposes? Is there wind that you will have to deflect? Take everything into consideration. If you need the fire to burn all night, and you don’t have too much wood, it’s going to need to be a smaller campfire.
Next, locate enough large rocks to create a ring to build your fire in. If no rocks are available, clear a spot on the ground or dig a shallow hole to contain your fire. Select an area on dry ground. Building the fire on a large, flat rock surface is preferable, but if you must build on soil, try to line the bottom of your pit with fine gravel or sand.
Containing the campfire is important for a couple of reasons. First, a well-defined campfire area increases the likelihood of everyone knowing what’s going on. Just lighting an impromptu fire on the ground could cause people who don’t notice it to run into it. Building a fire ring with heavy rocks is usually a group effort. At the very least, people take notice of the activity and will know to look out for a fire. It establishes a designated spot for your fire to live.
Secondly, a fire containment system, like a fire ring will help reduce the scattering of embers and coals by the wind. This is another good reason not to build the fire too close to tents or sleeping bags. Burning embers will melt right through those materials.
After your fire ring is built, or your shallow hole is dug in a suitable place away from anything you wouldn’t want to catch fire, you can start locating some fuel for that campfire if you haven’t brought your own.
HOW TO BUILD AND START A CAMPFIRE SAFETY TIP: DO NOT use rocks that you pluck from the river or ones that have been buried or sitting in and near water. Certain types of rocks do hold moisture. These rocks can fracture and explode due to the heat of the fire, sending sharp fragments in all directions.
Find And Select Tinder, Kindling, And Wood
For a small-medium sized fire, there are 3 classes of fuel you need to locate for building a fire with matches. They are:
- Tinder (wood shavings, splintered wood chips and shavings, dead pine needles, crushed up dead leaves)
- Kindling (twigs that range in size from toothpicks to pencils, and LOTS of them)
- Firewood (everything from the size of a magic marker to the size of your lower leg)
Tinder can be shredded paper, tiny twigs the size of toothpicks, crunched up dead leaves, you name it. If you have enough lint in your pockets, that catches a spark really well too. Can’t find any dry tinder? grab some toilet paper from your backpack. Just don’t use plastic for fuel. It’s fumes are toxic.
Kindling is anything the size of your matchsticks up to about the size of a wooden pencil. As with the tinder, make sure your kindling is bone dry. We need to nurture the tiny flame that your matches emit. If your firewood has a higher moisture content, you may find that you need to burn extra kindling after you’ve already put firewood logs on the fire. This is normal, so make sure you have the most kindling to help dry the firewood out until it catches.
Firewood can be big chunky sticks or split logs the size of your lower leg. Helpful TIP: The US Forestry service has a regulation about where your firewood can come from. Firewood should not be moved more than 50 miles from where it was harvested due to inherent pests in the bark. Best to collect or buy firewood from wherever you are camping.
Next, sort and set up all of your materials close to where you will build the fire. This makes it easier to nurture a tiny flame.
Prep The Structure Of The Campfire
If this step is done correctly, and your wood is dry enough, you will only need ONE match to start your campfire. Grab some kindling and make a small bed in the center of your fire ring laying the sticks side by side until you have a nice flat surface. Take the tinder, crumple it up in a large ball and place it on top of the small bed of kindling you’ve laid down. This leaves small channels under the tinder to allow extra air to flow in.
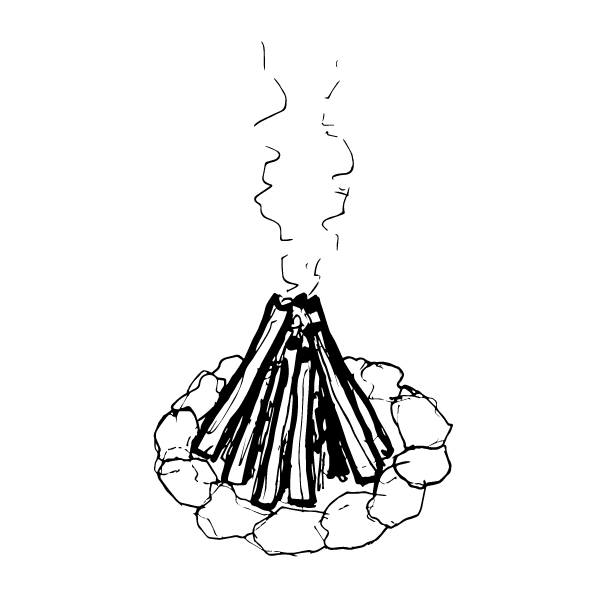
Leaving a small access gap that you will stick your lit match through to reach the tinder, neatly stack the smallest of the kindling in a “teepee” shape all around the ball of tinder, working your way outward getting progressively larger with your pieces of tinder until you are ready to do the same with the largest of the pieces, the firewood. Stack one layer of firewood around the teepee shape leaning the top ends against one another.
The reason for starting with the smallest pieces of tinder as possible is a matter of simple physics. The small flame of the match doesn’t have the intensity to light a large piece of dense firewood before it burns through its own source of fuel (the match stick).
With the small exposed fibers of the tinder, that just so happen to be about the size of the match stick, the flame is able to transfer itself to those and spread incrementally to larger and larger pieces of wood when it’s ready. Generally, the larger and more intense your ignition source, the larger the pieces of fuel you can light.
Light And Nurture The Fire
Take your nice dry match out of your pocket and get it ready to strike. Now get down on the ground close enough to see through the little gap you made to access the tinder. After you locate a good place to insert your lit match, strike your match and let the flame establish itself on the match stick. Carefully move the lit match into the gap making contact with the nice dry tinder. Hold it there until the flame starts to establish itself in the tinder. The flame should be growing to engulf the tender as it starts to transfer to the kindling.
If the flame doesn’t grow as naturally and quickly as you think it should, give the flame some oxygen by blowing lightly and indirectly under the base of the flame.
If your firewood does not catch before the flame starts to decline, you will have to nurture it with more kindling. This is why you will want extra kindling, just in case your firewood is too moist to catch right away. By keeping the fire burning with extra kindling, it may stay small for a while, but the small flame will start to dry the firewood, eventually allowing it to catch fire.
Once your flame is established and the largest of your firewood is burning, maintain the fire by using a poker to push the coals and partially burnt pieces of wood into the center of the fire.
Now that you’ve learned how to build and start a campfire, enjoy It.
Once you see white coals in the middle of the campfire and robust flames dancing around and through thick pieces of firewood, you’ll know it’s time to relax. It’s your time now. Spend that time however you’d like – unless you’re the camp cook, and in that case, your work has only just begun.